If you looking to buy an I Bond, but you’re not sure where you need to go or what you need to do, you’ve come to the right place. Just follow these simple step-by-step instructions. They will help you set up your TreasuryDirect.gov account and buy your first I Bond. If you have a printer, you may want to print these instructions so that you don’t have to go back and forth between these instructions and TreasuryDirect.
This could take 15 – 30 minutes. It’s good to take your time. There’s no reason to hurry. I suggest doing this on a computer, not a cell phone because you may be asked to allow your computer to use “Flash.” One of the demos provided at TresuryDirect uses Flash and should work fine on IE, Edge, Firefox and Chrome browsers.
If you are wondering why you would want to buy an I bond, please read the articles: “I Just Want to Save My Money!” and “Why Bonds are Smart for Savings“.
Step 1: Gather Your Info
You need to be a “U. S. Person” and have a Social Security Number in order to buy U. S. savings bonds. It’s one of the special privileges you have just for being a United States citizen.
You will need an address in the United States if you want to participate in buying I Bonds directly from the government, so have that ready too.
You will need to have a checking or savings account so that you have a way to pay for your I Bond. You can’t pay with a credit card but it’s ok if you don’t have paper checks. You just need to call your credit union or bank and get your checking account’s routing number and account number so you can pay Treasury Direct with electronic checks.
Like most online services these days, you will need to provide Treasury Direct with a valid email address. They intend to contact you electronically with information about your account.
You have to have a computer with a browser that can create a private line to Treasury Direct. Pretty much all computers for the last ten years have been able to do this. The computer you are using to read this should work as long as it is a private one. It’s probably not a good idea to do your finances on a public computer.
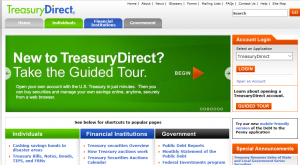
Step 2: Take the Guided Tour at TreasuryDirect.gov
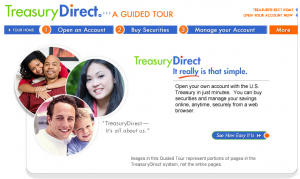
Although this government site has its own oddities, they’ve done a great job of holding your hand through the process of setting up your account. You and anyone in your household that has a Social Security Number is entitled to have a free account directly with the United States Treasury. They have a pretty nice “Guided Tour” that shows you the steps that you will go through when you set up your account. Here it is:
TreasuryDirect.gov’s Guided Tour
If you need to type the address in, here it is:
https://www.treasurydirect.gov/indiv/TDTour/default.htm
Step 3: Complete the Application Process at TreasuryDirect.gov
The application process will allow you to set up your TreasuryDirect.gov account by entering the information that you have collected.
From the Guided Tour page, you can find the application link in the upper-right corner of the page. It’s called “OPEN YOUR ACCOUNT NOW“. At the time that I write this, the letters are pretty small but they are all orange.
f you are on the Treasury Direct starting page, you will find the place to open the account underneath the orange login button. Just click on the words: “Open an Account”
Make sure that you record:
- Your new account number
- Your new password
- The answers to your security questions (they will ask them sometimes and it will lock you out if you don’t answer them correctly)
It’s a good idea not to save these things on any computer or cell phone. You might consider writing these down and saving them with other vital records and information you keep. Physically locking the information in a safe would be one good idea.
Step 4: Watch the Accessing Your TreasuryDirect Account Demo
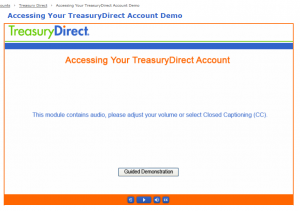
The TreasuryDirect site has quite a few security features. It’s a good thing but it also makes it a bit harder to use. I highly suggest that you watch the Flash Demo that they have created at the TreasuryDirect.gov site. You can click on the graphic on the right or click here. Make sure that you say “yes” if your browser asks if you want to us “Flash”.
Here’s the address if you need to type it in:
https://www.treasurydirect.gov/indiv/myaccount/myaccount_demo.htm
Step 5: Sign In to TreasuryDirect
To log in, locate the “Account Login” section in the upper right corner of the TreasuryDirect.gov website.
Select the “TreasuryDirect” link in that section. On the next page, select the orange “LOGIN” button.
If this is the first time that you have logged in, you may be asked to check your email for a special passcode. This is a security protection to make sure that it is really you. You must enter that code that you get from your email. You can choose the option to allow TresuryDirect to remember your browser. That way you won’t have to get special codes in your email every time you attempt to log in.
On the next screen you must enter your new Account Number. That’s not the passcode. That’s the one that you used when you first applied in step two above. After typing in your account number, hit the “submit” button.
You will then be taken to a screen that allows you to choose an image and a phrase. This might seem a bit silly, but it is actually a good security method. TreasuryDirect will show you this picture and phrase every time you log in. It’s a way for you to know you are actually accessing TreasuryDirect and not a fake.
If that image is ever not the one you remember. It’s a good idea to close your browser and contact TreasuryDirect by phone and tell them that something is wrong before going on. All these things are there to make sure that you are protected and that’s a good thing.
Below that you will see a graphical keyboard. Instead of typing your password using your keyboard, you need to type your password using the graphical keyboard, with your mouse.
After you hit the “submit” button, the weirdness is pretty much over. You will now be signed into TreasuryDirect. You should see a welcome message with your name at the top of the screen.
One other strange thing to keep in mind about the TreasuryDirect website: Don’t try to use your “back” button in the browser. That will force you out, requiring you to log in. TreasuryDirect will only allow you to use the buttons on the page to navigate. All these things help the web site give you a very secure environment.
I did find some graphical instructions at WikiHow that may also be very helpful.
Step 6: Buy Your I Bond
Now for the fun part. We are finally to the point at which you can buy your first I Bond.
Now that you have logged into your account, you will need to click on the button at the top called: “Buy Direct”
You will then see a list of options of things you can buy. In the list you will see an option for “Series I – An accrual-type security with a combination interest rate of a fixed and an inflation rate”
Select that option and Hit the blue “Submit“ button.
You will a place to enter your “Purchase Amount“. Enter the bond amount here. You can have a bond as low as $25 and if this is the only bond you plan on buying this year, you should be able to have one for as high as $10,000. I haven’t tried that before but it should work as long as you have the money. Make sure that the “Select a source of funds” drop-down box shows your checking account and then hit the “Submit” button.
That’s it. When you log back into TreasuryDirect, you will be able to check up on your I Bond and see its current value. This is also the place to go when you are ready to sell your bond. You can’t do that for the first year, because that’s one of the rules. It’s best to hold on to your bond for five years so that you get all the interest.
You can also buy other kinds of treasury investments this way including TIPS. That’s all it takes to take advantage of one of the safest and most effective ways to save for your future.